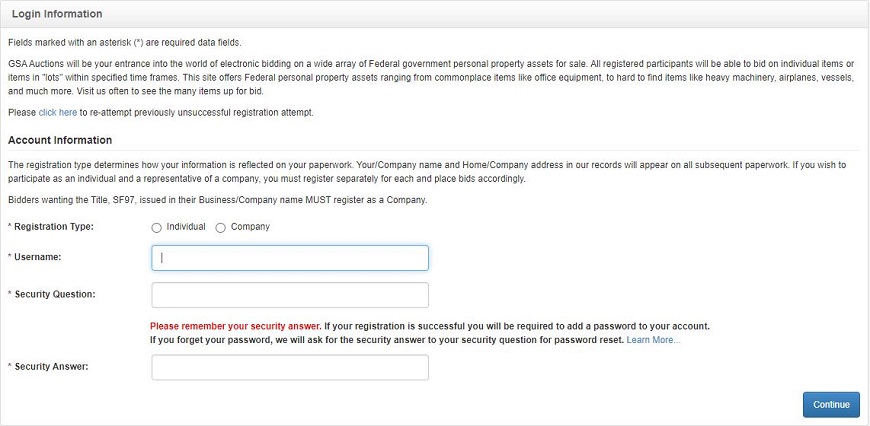
Step 1: Create Username and Security Question/Answer
- Click the Register button located at the top right corner of the GSA Auctions homepage.
- Determine your registration type by selecting either "Individual" or "Company."
- Enter a unique username. The system will verify whether your username is unique. If the username already exists, you will be prompted to enter a different username.
- Enter a Security Question and a Security Answer.
- Click the Continue button to proceed.
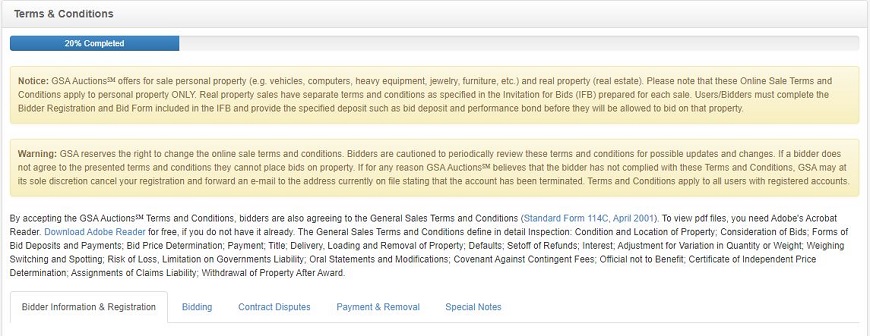
Step 2: Accept Sale Terms and Conditions
- Read the Terms and Conditions and click the Accept button at the bottom of the screen.
- The Registration Information Verification Notice screen will be displayed.
- Read the Registration Information Verification Notice and click the Continue button at the bottom of the screen to proceed.
Step 3: Create Personal or Company Profile
To view what the registration screen looks like for individuals, click here.
To view what the registration screen looks like for companies, click here.
- Enter your First Name and Last Name (your middle initial is optional).
- If you are registering on behalf of a company, ensure the Company name is entered (if bidding on a vehicle, this is how the name will appear on the SF-97).
- Enter your Date of Birth (required for individual registration).
- Enter your Email Address (your login will be based on your email address).
- Enter your Home/Business Address (you must enter a street address).
- If you are registering as an "Individual," enter your Social Security Number (this is mandatory and will be verified during registration). If you are registering on behalf of a company, enter your Employer Identification Number.
- Indicate whether or not you are a US citizen by clicking the drop down menu and selecting either "Yes" or "No."
- Enter the required Contact Information.
- If you are registering as an Individual, you have the option to participate in Experian's Credit Card Validation process. Either enter your credit card number, or skip this step. You will then read and accept the Consent for Experian's inquiry.
- Click the Continue button. Your personal information will be sent to Experian to be verified.
- A popup will be displayed to confirm your personal information. Click Continue to proceed.

- Individual registrants may get presented with Knowledge Based Questions that must be answered within a 5 minute window and Submitted to Experian for verification.
Experian will provide a score indicating the validity of the data that you have entered. If there are any errors, a message will be displayed informing you of the next steps you must follow in order to successfully register.
Failed Registration for Individuals with a U.S Mailing Address (including U.S. Territories) and an SSN:
- Email two forms of documentation to registration@gsa.gov (GSA Personal Property Management Sales Division, Central Office Headquarters) which reflects your current address, SSN and identification (at least one with a photo); The address on the documentation should match the address that you are providing for registration in our system and should be current; for example, a copy of your driver's license and a tax return (top portion only with earnings redacted). Please note that you risk sending your personal information from a possible non-secured location. Please secure and encrypt the documentation prior to sending.
- Ensure that the user name that you attempted to use at registration is included in the body of the email.
International Registration
If you are registering with an international address, you will be required to provide proof of identification to complete your registration. Specific requirements can be found in our Terms and Conditions (under the “Bidder Information & Registration” tab and “International Registration” section).
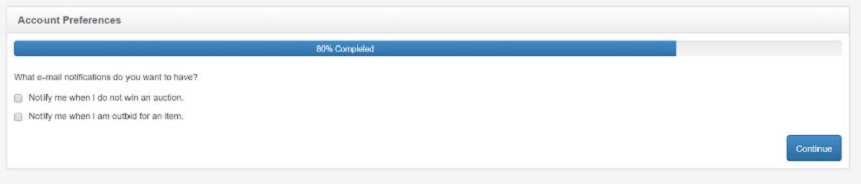
Step 4: Indicate Your Account Preferences
- Select your preferred email notifications. You will be able to adjust this selection accordingly at any point once you have successfully registered.
- Click the Continue button to proceed to the final step of the registration process.
- A confirmation page is displayed with instructions on how to activate your account.
Step 5: Activate Your Account: Establish Your Password and Multi-Factor Authentication(MFA) Options.
- GSA will send an email to the registered email address on file containing your login credentials (email address and temporary password). Copy your temporary password (it will be used on the login screen).
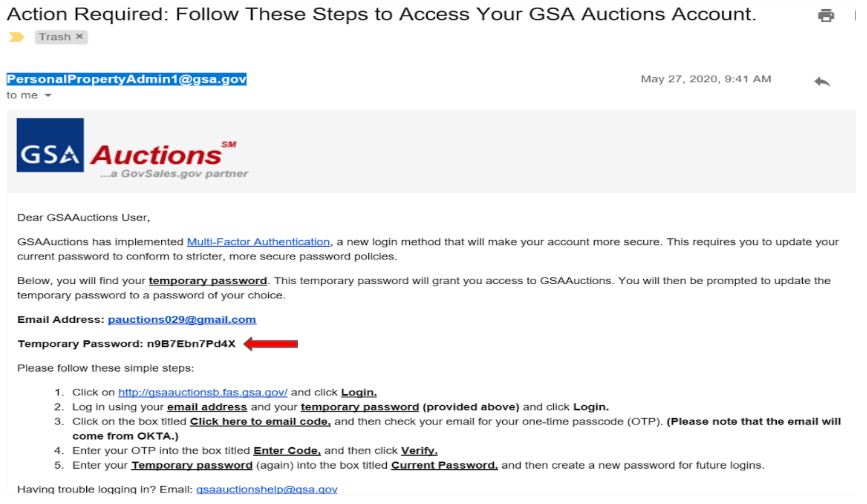
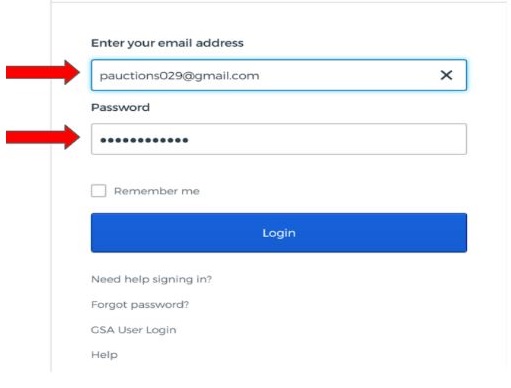
- Go to www.gsaauctions.gov and enter in your email address and temporary password (into the password field). Then, click the
Login
button.
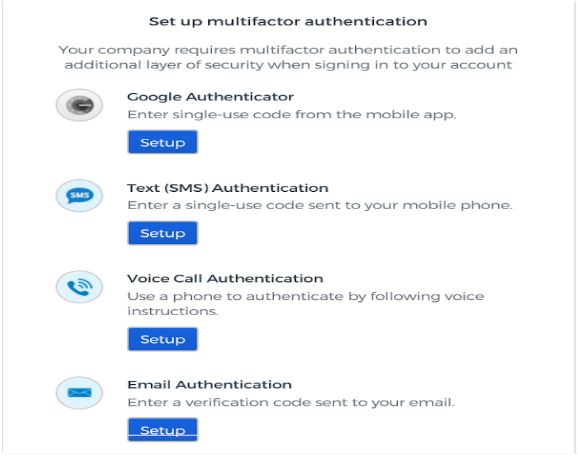
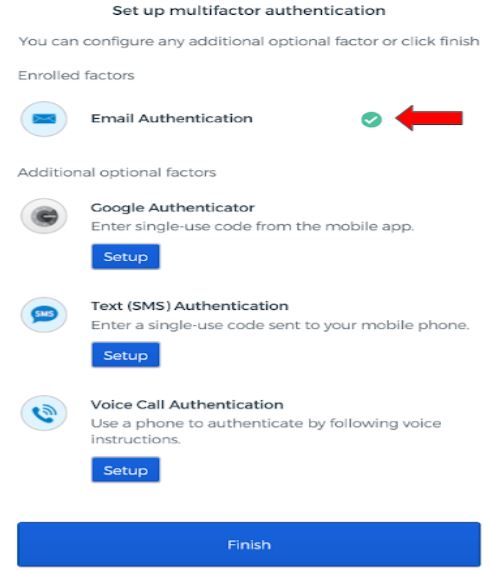
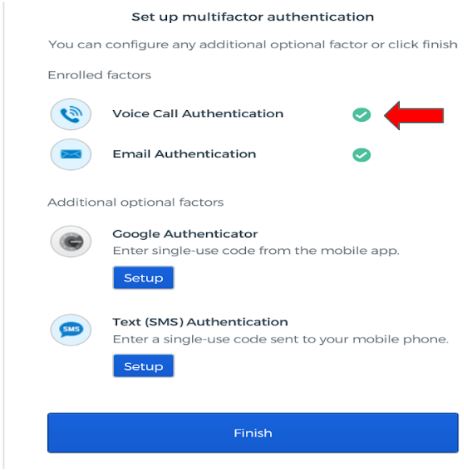
- Set up your factors by clicking on
setup
under the Authenticator of your choice. We recommend that you set up at least two factors. (Please note that the email and text authentication is not approved for future use, so please incorporate either voice or Google Authenticator as a factor.)
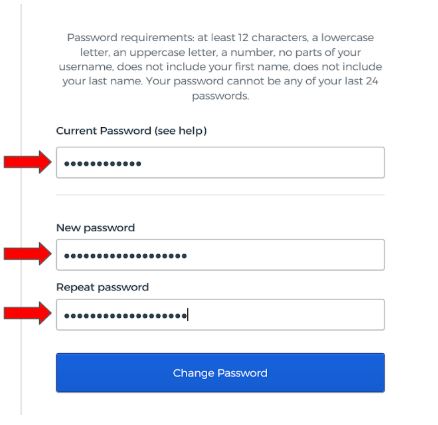
- Establish your password. Go back to number 1 under step 5 and copy your temporary password. Paste your temporary password into the
Current Password
field. Then, create a new password that meets the password requirements.
Set Up Email Authentication:
- Click
Send me the code.
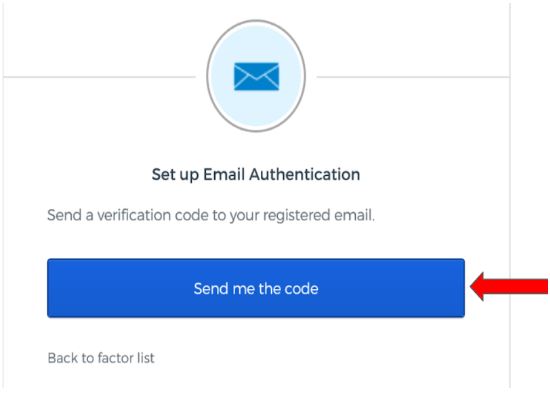
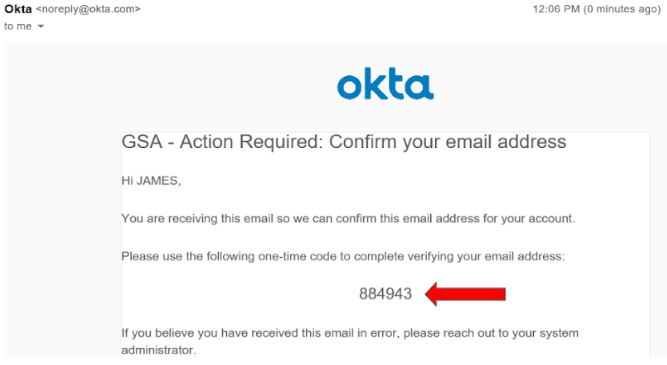
- Check your email for an email from OKTA that contains your code. (Please note: If you do not receive an email, check your spam/junk folder. If you still do not see it, please contact the helpdesk.)
- Enter your code into the field titled
Verification Code,
and then click Verify.
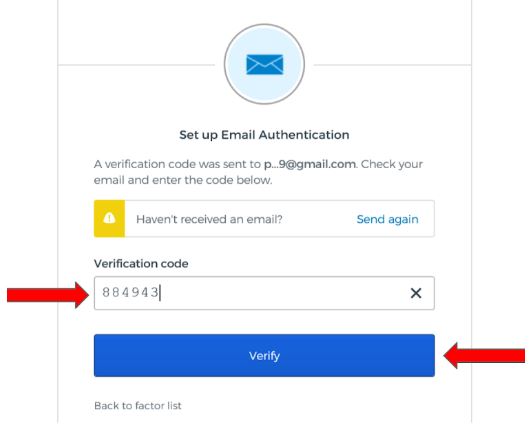
- You will see a green checkmark once your email has been successfully set up. (Please Note: If you only want to set up one authenticator, you can click
Finish.
)
Set Up Voice Authentication:
- Enter in your phone number (cell or landline), and click
Call.

- You will receive a call with a five digit code. Enter in code and click
Verify.
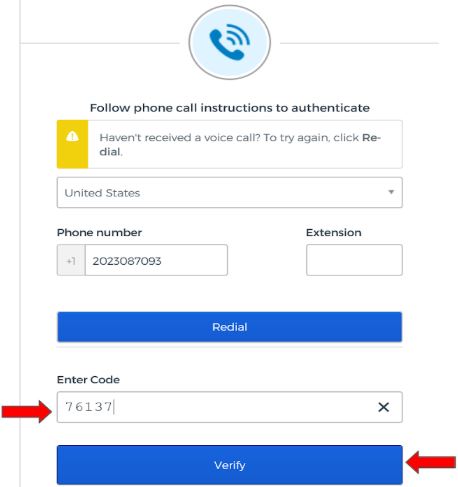
- You will see a green checkmark once your voice authentication has been successfully set up. (Please Note: If you only want to set up one authenticator, you can click
Finish.
)
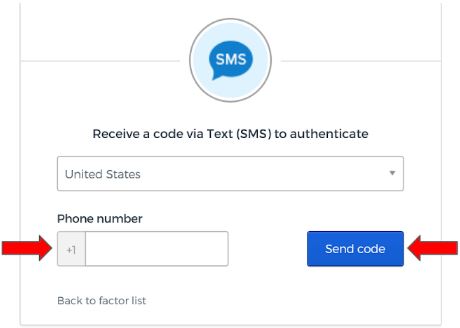
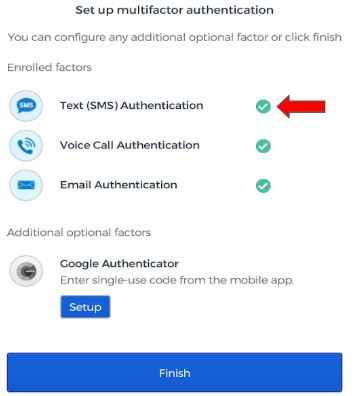
Set Up Text (SMS) Authentication:
- Enter in your phone number and click
Send Code.
You will receive a six digit code through your mobile device.
- Enter in your six digit code and click
Verify.
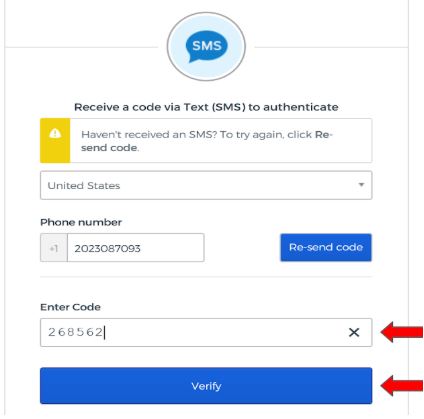
- You will see a green checkmark once your text (SMS) authentication has been successfully set up. (Please Note: If you only want to set up one authenticator, you can click
Finish.
)
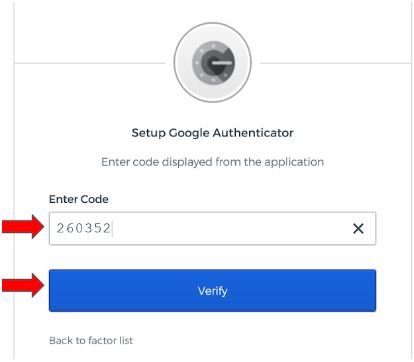
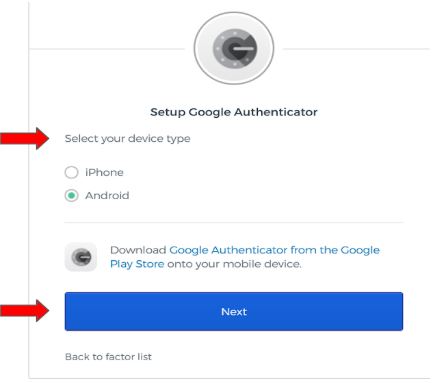
Set Up Google Authenticator:
- Open the Google Authentication app on your mobile device.
- Select your device (iPhone or Android) and click
Next.
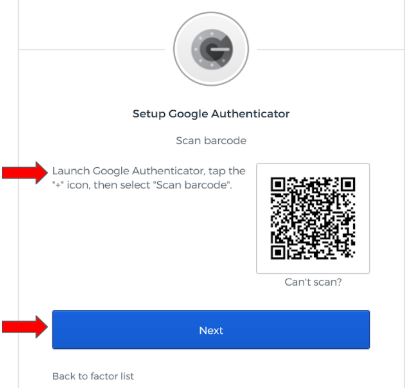
- From the Google Authenticator app, tap the
+
icon, then select Scan barcode.
Once you scan the barcode, click Next.
- Enter in the code generated from the app and then click
Verify.